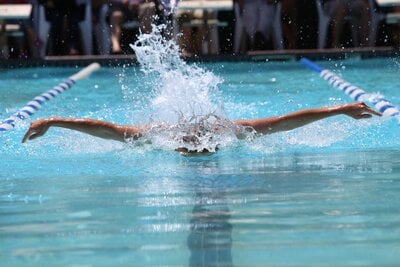
Mastering the butterfly stroke arm movement is a critical part of being able to swim butterfly fast and efficiently. In butterfly, the upper body plays a vital role in generating speed and propulsion while the legs set the tempo and pace for your stroke as well as helping you to maintain a high body position.
The butterfly arm technique is less complicated compared to the pulling patterns of other strokes as you are utilizing both arms at once. That said, there are some common pitfalls that can cause nuances in your stroke.
That’s why in today’s article, we’ll be covering the butterfly arm mechanics. We’ll go over the 3 main phases of the arm movement, the technique for each, some common mistakes to avoid, as well as how to put everything together to swim butterfly fast and efficiently.
The 3 Main Phases Of The Butterfly Stroke Arm Movement.
1. The Catch.
The catch is the first phase of the butterfly arm movement and is critical for getting a good grip in the water, which will set you up for a strong and powerful pull (second phase) creating a lot of propulsion and speed as you swim.
The catching phase starts as soon as the hands enter the water at the front of your stroke and ends when your forearms have formed roughly a 60° bend and are sitting just in front of the upper chest and shoulders, making it the shortest of the 3 butterfly arm stroke phases.
Prephase- The Hand Entry.

Your hands should enter the water shoulder-width apart or slightly wider if you prefer it.
It’s important that you enter with your middle fingers first and your palms facing down as this will set you up to immediately catch the water.
That said, some swimmers prefer entering with the thumbs first. This is not a problem as long as the angle of the hands aren’t over-exaggerated. Ideally, if you want to use this hand entry the angle of the hands should be between 30-45°.
Problems start to occur when entering with the thumbs and index fingers at an angle of more than 60°. This setup will increase the time it takes for you to get into the catching position.
Additionally, it internally rotates the shoulder joints which adds extra stress that can lead to shoulder injuries in the long run. In some cases, it may also cause the swimmer to pull too wide.
The Catch
After the hands have entered the water, comes the actual catching phase, where the swimmer grips the water to set up for the pulling phase of the arm movement.
During this phase, the swimmer will bend the elbows simultaneously as they start to pull backward, allowing them to effectively engage all major upper body muscles such as the chest, lats, upper back, and shoulders as well as smaller muscle groups like the biceps to allow for maximal power output.
Some common mistakes in the catch phase include sweeping outwards away from the body before starting to pull back. This is an older way of swimming butterfly and isn’t typically used anymore as it will not only cause the body to drop in the water but will also increase the time it takes to get into the pulling phase.
Ideally, once the hands have entered the water, bend the elbows backward while pulling more inwards towards your hips as you prepare to enter the pulling phase of the stroke.
Another mistake is pulling down towards the floor to lift the head out of the water for the breath. In swimming, you always want to focus your energy on pulling backward to generate forward propulsive force.
If this is the case for you, focus on a strong down kick to lift the upper body rather than expending energy from your catch to lift out of the water.
2. The Pull.
After the catching phase, comes the pull. This phase of the arm movement takes place after the elbows have bent roughly 60°, usually just in front of the upper chest and shoulder joints, and ends after the hands have passed the hips and started exiting the water for the recovery phase.
This is the second-largest phase of the butterfly arm movement and is where most of the forward propulsive force comes from.
To execute this phase your hands start wide and then sweep in underneath your belly button, with the forearms staying perpendicular to your body throughout most of the movement, from there they’ll then sweep back out allowing them to pass the hips and exit the water.
The outsweep starts once the hands have reached their narrowest point underneath the belly button and is more of a pushing movement rather than a pull, allowing the hands to shoot out of the water as you prepare to enter the final phase of the butterfly arm stroke.
It’s important not to sweep out too far, but rather just enough to allow your hands to pass the hips. If you sweep out too far, the hands and forearms will exit your bodyline which can create drag.
In contrast, a common mistake swimmers make is not sweeping the hands in far enough so that they are under the belly button. This will create additional torque as your hands are further away from your center of mass.
Also, make sure that you aren’t ending your pull before the hands have passed the hips and started exiting the water. The arms should be fully extended and the tricep muscles at maximal flexion. Ending your pull prematurely will cause you to lose a lot of power.
With all that said, one of the most important parts of the pulling phase is to maintain a high elbow position, allowing the hands and forearms to effectively pull and push water backward. If your elbow position drops, you’ll be pushing the water more downwards rather than back, causing your hips to drop and chest to lift, which creates an inefficient butterfly stroke.
Here is a great video explaining the butterfly pulling phase an in depth manner-
Hand Exit
You want to exit your hands with the pinky-fingers first as you bring them out of the water to enter the recovery phase of the arm movement.
3. The Recovery.
The recovery is the final stage of the butterfly arm movement and from a range of motion perspective- the largest. From a technical perspective, it’s also a bit simpler to get down.
The recovery phase of the butterfly arm movement starts as soon as the hands exit the water and ends when they start to re-enter the water for the catching phase of the next stroke cycle.
Unlike freestyle, where you want to maintain a high elbow position above the water, here you want to keep the arms low above the surface bringing them over in a circle like motion as you prepare to re-enter the water. Make sure that your arms are mostly straight throughout the movement and that they aren’t touching the water until re-entry.
An important aspect of the recovery is to keep it relaxed and to use mostly momentum to bring your arms over. If you initiated the pulling phase correctly, you should be able to shoot your arms over back into the catching phase without much effort.
A common mistake swimmers make is not using momentum to carry their arms over. This causes the swimmer to use the back and shoulder muscles to bring their arms over, defeating the point of the recovery phase. It may also cause a drop in your hips which will create extra drag.
Here’s a quick video offering a more visual explanation to everything we’ve covered so far, see how many elements of the butterfly arm movement you can identify-
Related: Butterfly Breathing Technique Guide.
Butterfly Arm Movement Drills.
Push Through Drill.
The push-through drill is one of the most popular butterfly drills among competitive swimmers and is a great drill for developing a variety of technical points. In terms of the arm motion, this drill will teach you how to catch the water properly and then execute a powerful pull through.
How to perform the drill-
- Start by placing the arms in front of you extended out roughly shoulder-width apart.
- Perform light butterfly kicks while doing some light sculling in front of you as you get a feel for the water.
- When you are ready, pull the arms down and back, creating a bend in the forearms and initiating the catching phase.
- Then continue pulling back as you enter the pulling phase until the hands shoot just out of the water at the back of your stroke.
- This should be a fast and explosive movement.
- Once the hands have exited the water, do some light freestyle or breaststroke kicking as you recover them back towards the front underneath your body. (The recovery phase isn’t executed in this drill.)
- Then repeat the movement. You should be able to do it 3-4 times throughout a 25m distance.
- You can use fins, a snorkel, or paddles when doing this drill.
Angel Wings Drill.
In contrast to the push through drill, the angel wing drill works on the recovery phase of the butterfly arm movement. This drill is more advanced and can be quite challenging to perform, which is why I recommend using fins when doing it.
How to perform the drill-
- Start by lying face down in the water with your arms extended shoulder-width apart in front of you.
- Start doing light butterfly kicking once you are in this position to start moving forward.
- Then move your hands backward over the water until they are just outside of your hips (as they would be when they exit the water after the pulling phase).
- Once there, take a quick breath, place your face back in the water, and recover your hands back to the front of your stroke.
- Repeat this for a couple of 25s or 50s.
- You may also use a snorkel with this drill if you find the breathing hard.
- During this drill, the catching and pulling phase is not executed.
3, 3, 3 Butterfly Swimming Drill.
To bring everything together, you can use the 3, 3, 3 butterfly swimming drill. This drill combines all 3 phases of the butterfly arm movement and allows you to complete each with separate arms before using both arms simultaneously as you would in normal butterfly swimming.
How to perform the drill-
- Start by pushing off the wall and going into the butterfly body position, using your normal kicking pattern.
- Once there, break out using only 1 of your arms. Perform 3 strokes with that arm working on the butterfly arm movement pattern, before performing 3 strokes with the other.
- Then perform 3 strokes with both arms simultaneously as you would in normal butterfly swimming.
- When performing the arm strokes with separate arms you may breathe to the side if you find it more comfortable.
Related: How to swim butterfly without getting tired.
Training Equipment To Improve The Butterfly Arm Mechanics.
Snorkel: The snorkel is an invaluable piece of equipment that every swimmer should own. In terms of the butterfly arm mechanics, you can use the snorkel to eliminate breathing from your stroke, allowing you to solely focus on the actual swimming and execution of the stroke.
If you are in need of a good swimming snorkel, I recommend the FINIS swimmer’s snorkel or the Arena Swim Snorkel 2. You can check them out on SwimOutlet by clicking here.
Paddles: If you want to add some power to your butterfly pull while getting a better feel for the water, then paddles are a great piece of equipment to use. I like the Speedo Powerplus Paddles. You can check them out on SwimOutlet by clicking here.
Pull-Buoy: The pull-buoy is going to allow you to eliminate the kick, allowing you to solely focus on the arm mechanics of your stroke. When swimming butterfly with the pull-buoy don’t worry too much if your legs are still moving a bit, this is natural since there is a lot of undulation throughout the stroke. For some good pull-buoy options, click here.
Related: Best tech suits for butterfly swimmers.
Conclusion.
Even though butterfly is a kick-dominant stroke, the arm mechanics still plays a large role in generating speed, especially in the sense of propelling the body forward in the water. That’s why it’s important to master the arm movement technique if you want to become a good butterfly swimmer.
Related swimming articles-
- 3 Phases Of The Butterfly Stroke Arm Movement (Technique)
- Butterfly Breathing Technique Guide (Styles, Tips, And More)
- Long Distance Swimming Technique: 7 Key Steps To Perfection
- How To Swim Breaststroke Efficiently- 8 Steps For Results
- How To Swim Butterfly Without Getting Tired- 5 Expert Tips
source https://swimcompetitive.com/swimming-technique/butterfly-arm-movement/
No comments:
Post a Comment